1. What is fiber jumper?
The fiber jumper connects the network devices at both ends and is used in the following three scenarios.
- between devices
- between the device and fiber patch panel
- between fiber patch panels
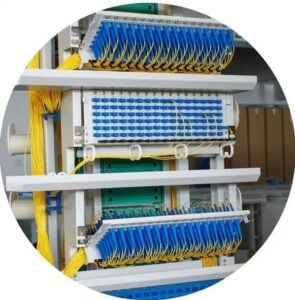
ODF

Fiber optic patch cord
Classification of optical fiber
According to the classification of fiber optic interface
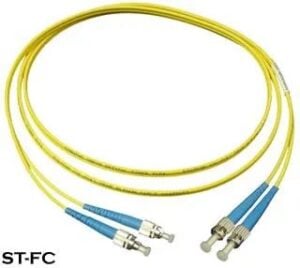
- FC Connector: use a metal sleeve for external reinforcement, fastened with a screw fastener. Generally used in the ODF (the most used on MDF)
- SC Connector: connected to the GBIC module, its shell is rectangular, plug the pin latch to fasten, and do not have to rotate. (The most used on routers and switches)
- ST Connector: commonly used in ODF, the shell is round, and fastened with a screw fastener. (ST is usually for 10Base-F. )
- LC Connector: for connecting SFP modules, it is made with an easy-to-operate modular jack (RJ) latching mechanism. (Commonly used in routers)
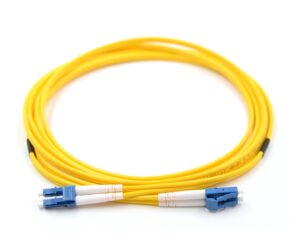
LC-LC

SC-LC
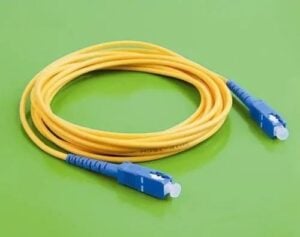
SC-SC

According to the length
There are 1.5m, 2m, 3m, 5m, 10m, 15m, and 20m available, and it can also be customized.
According to the usage
- LC interface is commonly used between devices.
- FC interface is commonly used in ODF to connect the remote core.
- SC interface is often used for ODF and equipment.
2. What are the principles of deploying fiber jumper?
In order to reduce the difficulty of subsequent operation and maintenance, it is best to follow the following principles when deploying.
-
- Fiber jumper operation must meet the principles of ODF rack, light crossing, neat complex box, beautiful wiring, easy to operate, and less space.
- Fiber jumper length must be mastered in the 500mm remaining length range.
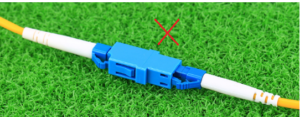
- The length of the inadequate fiber jumper shall not be used, the use of flanges to connect two sections of fiber jumper is not allowed.
- Each fiber jumper should ensure that the radius of curvature of each place is greater than 400mm.

- Connect one end of the optical fiber to the device port, route the other end through the cabling slot, pull out the fiber tray, wrap the excess optical fiber into a circle, lay it on the fiber tray, wrap it with fiber bundling tape, and push it onto the fiber tray, and connect the other end to the device or ODF rack.

- Connect one end of the optical fiber to the device port, route the other end through the cabling slot, pull out the fiber tray, wrap the excess optical fiber into a circle, lay it on the fiber tray, wrap it with fiber bundling tape, and push it onto the fiber tray, and connect the other end to the device or ODF rack.
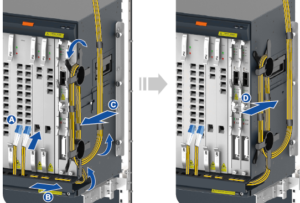
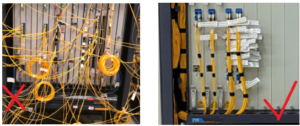
- General requirements for fiber routing: ① For an optical fiber that is routed from the top, line down the outside of the ODF rack, select the disk fiber column with the most appropriate amount of residual fiber, and route the fiber upward on the inside of the ODF rack, horizontally along the bottom edge of the ODM, and vertically upward to the corresponding terminal.② A fiber jumper is only allowed to go up once (along the outside of the ODF rack) or up once (along the inside of the ODF rack) in the ODF rack. It is forbidden to wrap, cross or hang between multiple fiber columns, that is, no fiber entangling is allowed on the top edge of each fiber column.③ The specific situation of the site should be adapted to the binding regulations after the initial sorting of fiber jumper.④All fiber jumpers must be laid inside the ODF rack, and it is strictly forbidden to lay outside the rack or fly wires.⑤ The super long fiber jumper for emergency use should be hung on the inner fiber plate according to the rules, which can not affect the future fiber jumpers.
- Do not intertwine one optical fiber between multiple optical fiber trays.
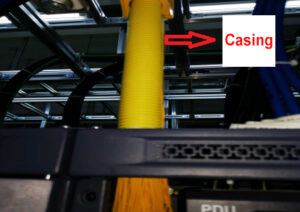
- When an optical fiber crosses a cabinet, use a casing to protect the optical fiber from being squeezed by other cables. Lay out the optical fiber in the distribution frame if it has a distribution frame.
- When connecting optical fibers, do not pull too tightly and the joints are at right angles.
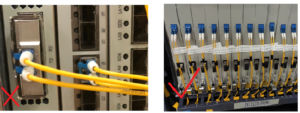
- All optical fibers must be laid in the cabling slots. Do not lay out the optical fibers outside the rack or stray cables.
- Do not use an optical fiber whose length is insufficient. Do not use an optical adapter to connect two optical fibers.
- Clean the end face of the optical fiber (optical connector) when inserting the optical fiber. Do not touch the end of the optical fiber with your hands or allow the end of the optical fiber to touch objects in the production environment.
- When connecting an optical fiber, insert the optical connector vertically into the optical port. The entire fiber connector should be inserted into place. Commonly used SC and LC connectors will hear a snap to indicate that they are in place.

- Do not pull the optical fiber forcibly. Otherwise, the optical fiber and connector may crack.

- Do not twist the optical fiber. To avoid twisting the optical fiber, coil the optical fiber according to its natural relaxation state.

3. What is the process for deploying fiber jumper?
Now that you know the concept and routing principles of Fiber Jumper, it’s time to get started in laying out your fiber jumper, which consists of six steps:

- Preparation
Prepare tools, materials, and disk information based on service requirements.
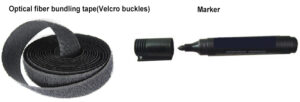
- Tools: marker, tube sleeve, label, oil pen, notepad, pliers, electric tape.
- Materials: Optical fiber, optical module, fiber binding tape (nylon bonding tape), and the quantity, type, or length of the corresponding materials depend on requirements.
- Disk preparation: Learn about the IDC, the location of the equipment, and ODF, and record them.
- Get a variety of colored ties that can tell the difference between Fiber jumpers for different purposes.
- Select optical fibers
- Select proper optical fibers based on the interface type and length.
- Choose the corresponding optical fiber according to the interface, beam splitter, and flange head on the fiber splitter box.
- Choose the length of the optical fiber, keeping the allowance of the fiber length within 50 cm.
- Lay out optical fibers
Lay out the fibers as the fiber jumper rules.
- Locate the ports, optical splitters, or fiber splitters.
- Remove the optical fiber connector.
- Insert the connector on one end of the optical fiber into the corresponding device port.
- Lay out the optical fibers along the cabling area to the corresponding devices.
- Insert the connector on the other end of the optical fiber into the corresponding device port.
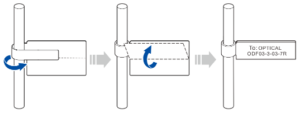
- Paste labels
- In order to facilitate equipment maintenance, a label should be pasted at each end of each fiber 1 cm~2 cm from the connector.
- All fiber labels must be machine labeled and handwritten is not allowed.
- For simultaneous placement of multiple fibers, first, mark the fibers with a marker to avoid confusion, and then attach the fiber labels after placement is complete.
- Both ends of the fiber need to be labeled.
- The label should be oriented in the same direction after pasting. For vertical cables, the head of the label generally faces left. For horizontal cables, the head of the label is usually facing down.
5. Bundling optical fibers
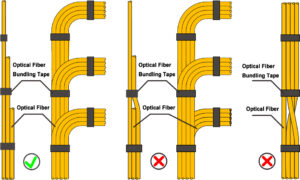
- Use optical fiber bundling tapes to bind optical fibers at a certain spacing.
- When optical fibers are bundled, the space between binding straps is 20 cm.
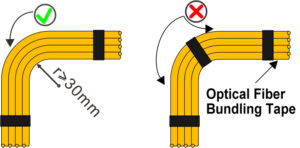
- When an optical fiber is cornering, bind the binding straps on both sides of the corner to prevent excessive force at the bend of the optical fiber from breaking the core. The bending radius of a 2 mm optical fiber cannot be smaller than 30 mm. The bending radius of a 3 mm optical fiber cannot be smaller than 40 mm.
- The contact surface between the binding tape and the optical fiber is a hairy surface, and the hook surface of the binding tape does not contact the optical fiber.
- Straighten out optical fibers before bundling them. Optical fiber bundling tape The optical fiber should be tightly bound. Do not bind the optical fiber too tightly. Do not interlace optical fibers.
6. Finishing touches
- Tool arrangement: arrange the tools used for installation to the designated position.
- Rest material recovery: recycle the remaining materials of the project.
- Clean up the debris: Clean up the garbage generated by the installation to ensure a tidy environment.
- Complete the installation report: forward the site installation report to the relevant person in charge. If the site is in normal operation, inform the operation and maintenance personnel that the fiber jumper has been completed.
The standardized fiber jumpers can make your cable look neat, make it easier for future project maintenance, and make it easier to find your fiber or locate a fault. That’s a good thing once and for all.
Related Products:
-
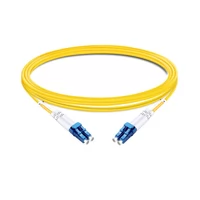
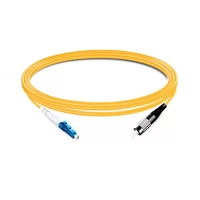
 3m (10ft) Duplex OS2 Single Mode LC UPC to LC UPC OFNP Fiber Optic Cable
$3.10
3m (10ft) Duplex OS2 Single Mode LC UPC to LC UPC OFNP Fiber Optic Cable
$3.10
-
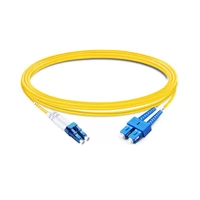
5m (16ft) Duplex OS2 Single Mode LC UPC to SC UPC PVC (OFNR) Fiber Optic Cable
$2.90
-
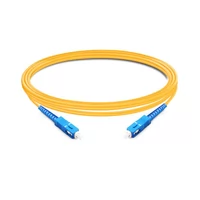
3m (10ft) Simplex OS2 Single Mode SC UPC to SC UPC LSZH Fiber Optic Cable
$1.50
-
5m (16ft) Duplex OS2 Single Mode LC UPC to ST UPC PVC (OFNR) Fiber Optic Cable
$3.00
-
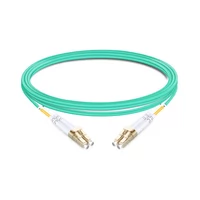
5m (16ft) Duplex OM4 Multimode LC UPC to LC UPC PVC (OFNR) Fiber Optic Cable
$4.80
-
3m (10ft) Simplex OS2 Single Mode LC UPC to FC UPC PVC (OFNR) Fiber Optic Cable
$1.40
-
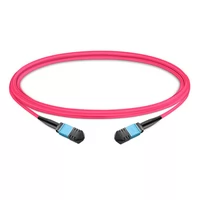
3m (10ft) 12 Fibers Female to Female MPO Trunk Cable Polarity B LSZH Multimode OM4 50/125
$26.00
-
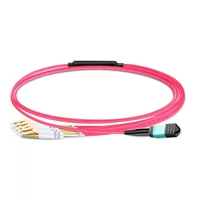
3m (10ft) MPO UPC Female to 4 LC UPC Duplex OM4 50/125 Multimode Fiber Breakout Cable, 8 Fibers Type B, LSZH, Aqua/Violet
$27.00