NVIDIA DGX Spark — the world’s smallest AI supercomputer powered by the NVIDIA GB10 Grace Blackwell Superchip — brings data-center-class AI performance to your desktop. With up to 1 PFLOP of FP4 AI compute and 128 GB of unified memory, it enables local inference on models up to 200 billion parameters and fine-tuning of models up to 70 billion parameters.
In this comprehensive guide, we walk you through unboxing, initial setup, system verification, remote access, Docker configuration, and more — everything you need to get started with DGX Spark quickly and efficiently.
1. DGX Spark Hardware Specifications
The NVIDIA DGX Spark delivers impressive AI performance in an ultra-compact desktop form factor (150 mm × 150 mm × 50.5 mm, weighing only 1.2 kg). It is perfect for AI developers, researchers, and engineers who want to prototype, fine-tune, and run large language models locally — or even take it to client sites for live demonstrations.
Key Features:
- Built on the NVIDIA GB10 Grace Blackwell Superchip
- NVIDIA Grace CPU — high-performance 20-core Arm architecture
- 128 GB unified system memory (coherent memory shared between CPU and GPU — no more data copying between host and device memory)
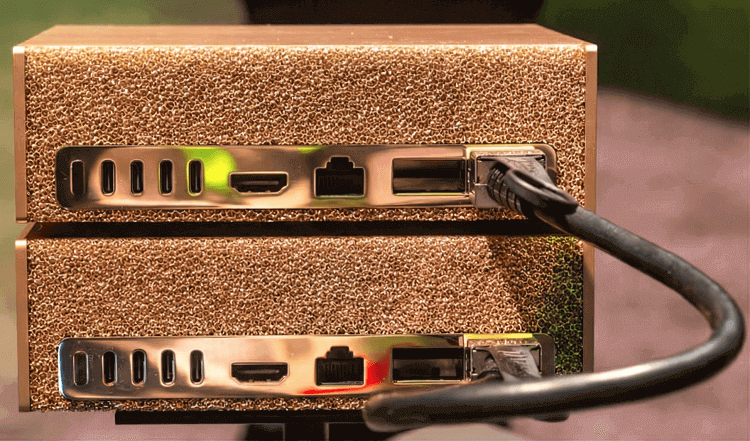
- Advanced connectivity: NVIDIA ConnectX™ high-performance networking (supports direct two-unit interconnection), Wi-Fi 7, and more
- Supports local inference on AI models up to 200B parameters (Two interconnected DGX Spark units can handle models up to 405B parameters)
- Up to 4 TB local NVMe storage (expandable via Type-C external storage)
- Extremely compact and portable — ideal for AI sales engineers and field demonstrations
2. Unboxing & Device Connections
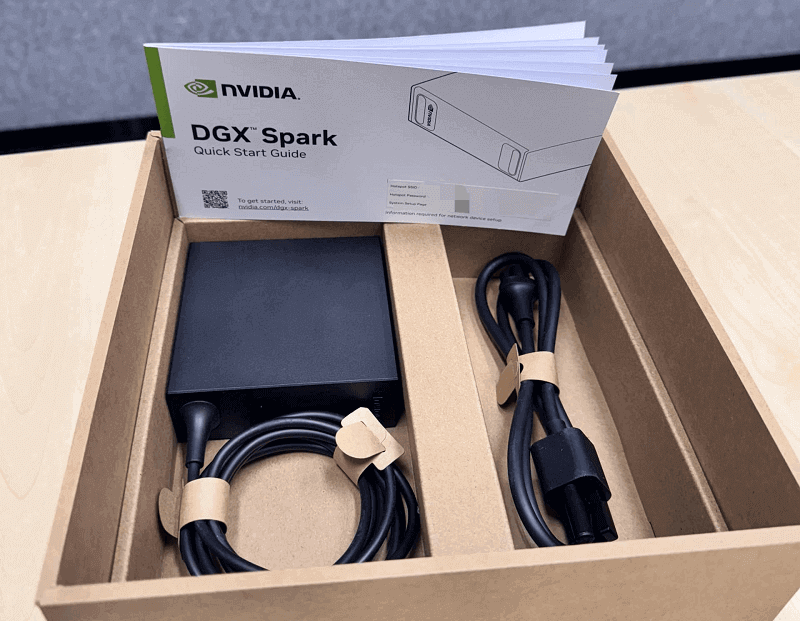
What’s in the Box
- 1 × NVIDIA DGX Spark main unit
- 1 × AC power cord
- 1 × USB-C DC power adapter
- 1 × Quick Start Guide
Connection Steps (Standalone Mode)
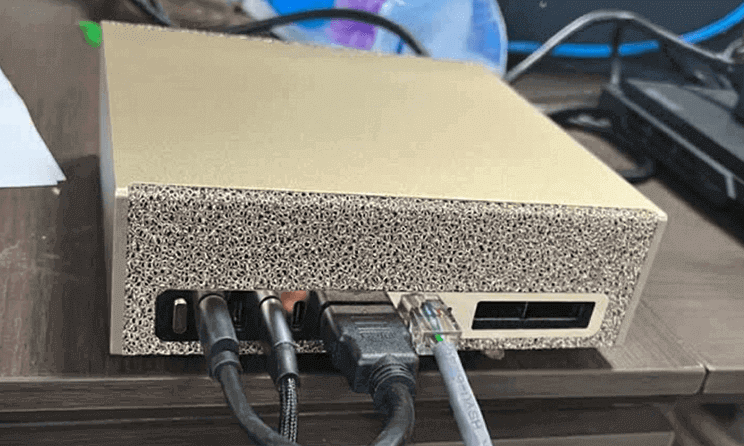
The DGX Spark supports two operating modes: standalone (with monitor/keyboard/mouse) and headless networked mode. This guide uses standalone mode.
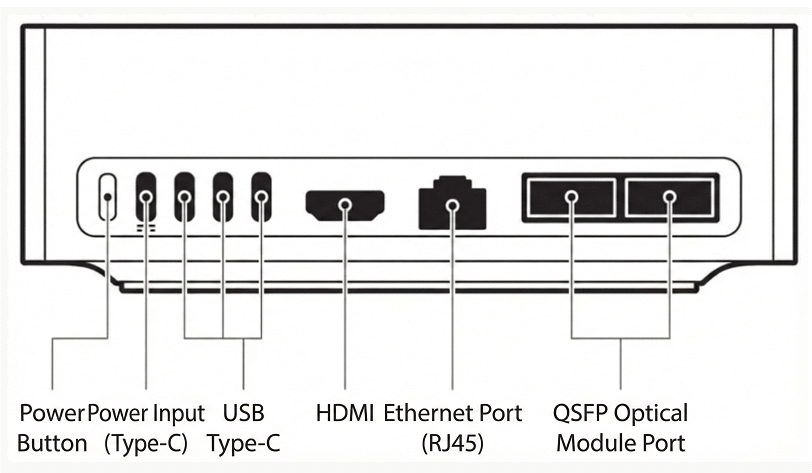
- Connect an HDMI monitor
- Connect a USB or Bluetooth keyboard and mouse (If no input devices are detected after power-on, the system will prompt you to enter Bluetooth pairing mode)
- Connect the power adapter Important: Use only the leftmost Type-C port
- Press the power button to turn on the device
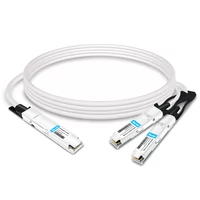
Connecting Two DGX Spark Units
First Boot & Initial Setup Wizard
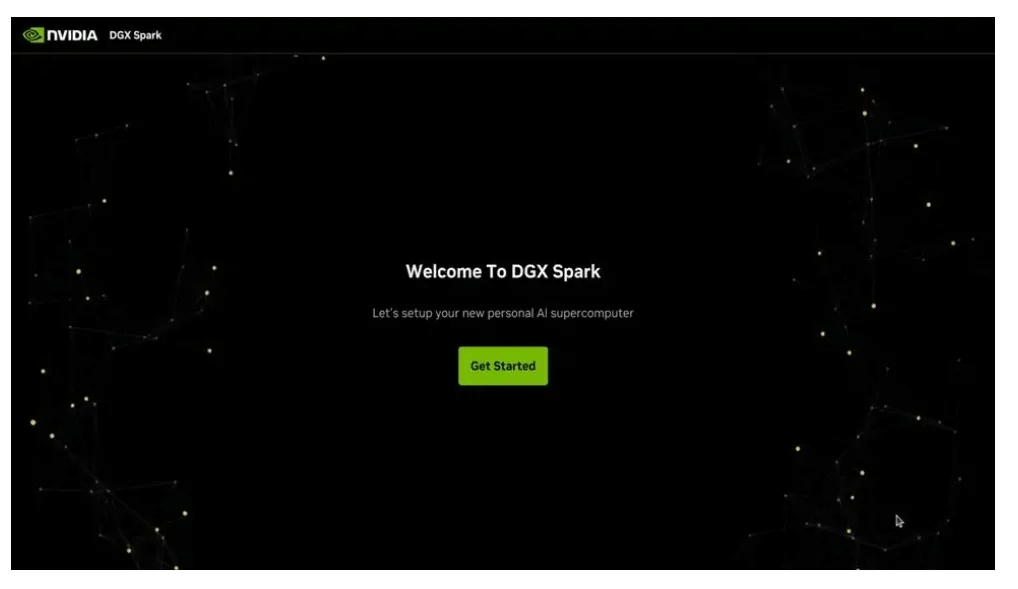
After powering on in standalone mode, the DGX Spark automatically launches the first-time setup wizard on the connected display.
Follow these steps:
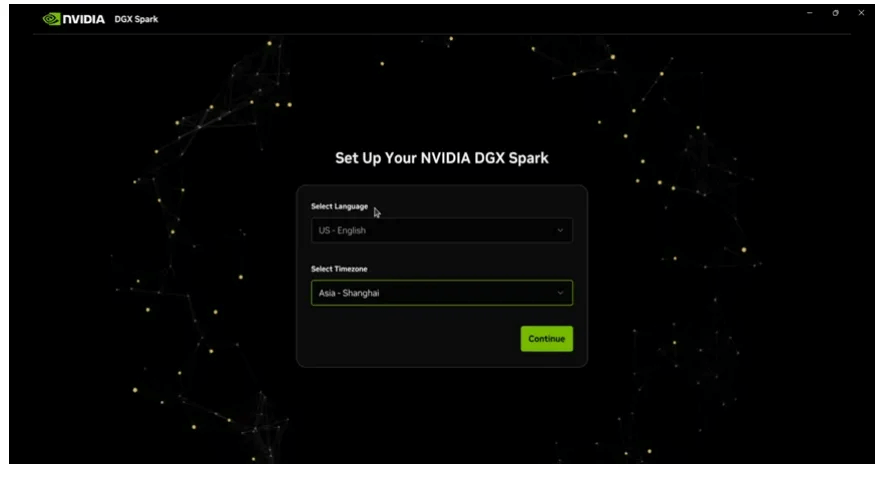
- Language & Time Zone Select your preferred language and time zone (the input field auto-filters as you type).
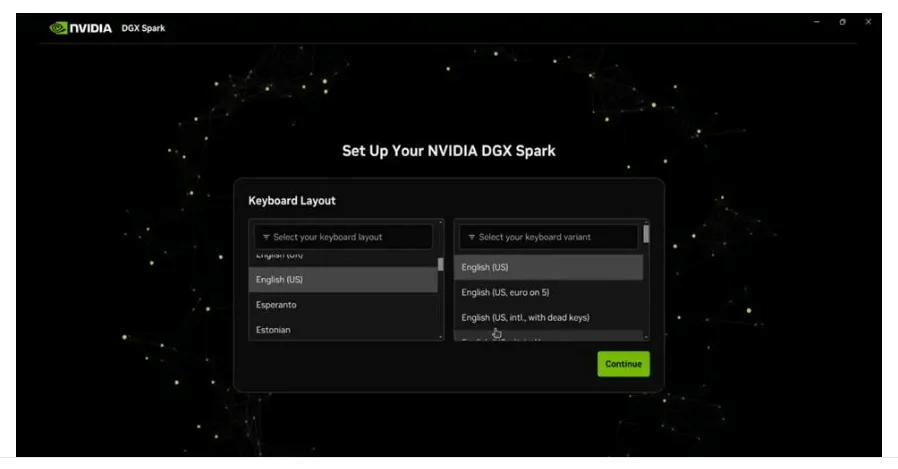
- Keyboard Layout Choose the correct keyboard layout (only shown when using a physical display).
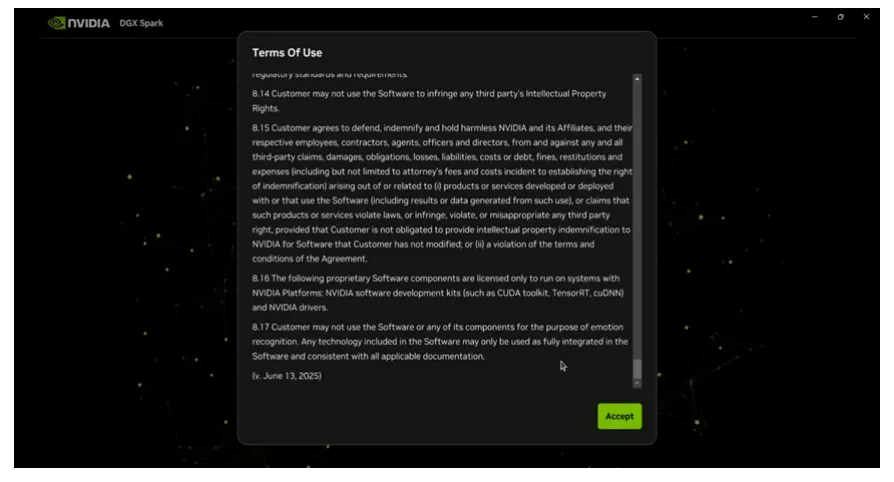
- License Agreement Read and accept the terms (pre-installed OS — just click Accept).
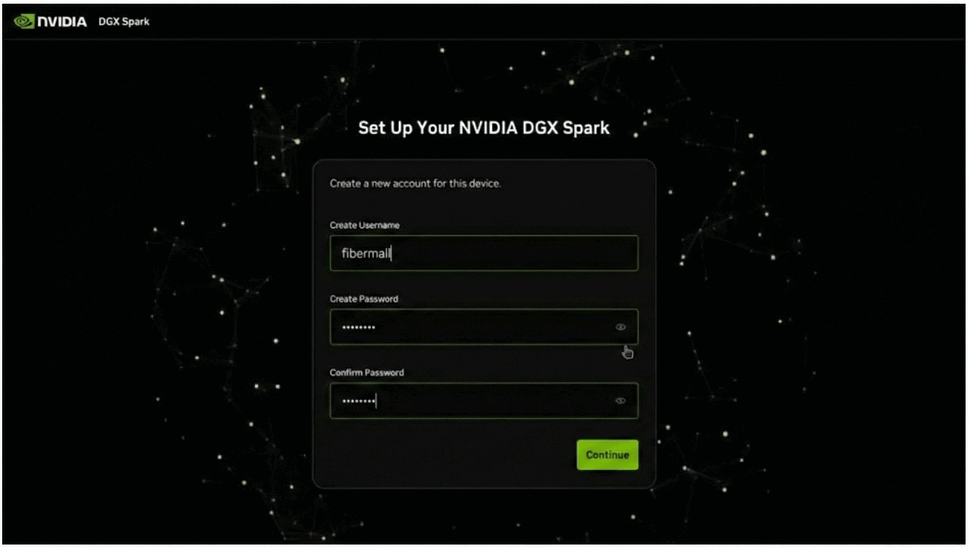
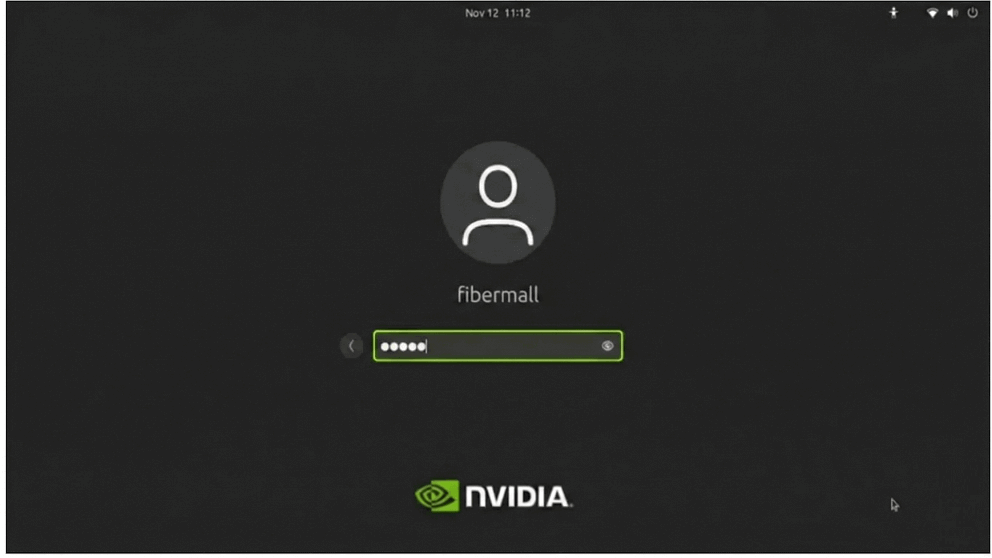
- Create User Account Set up a username and password for system login.
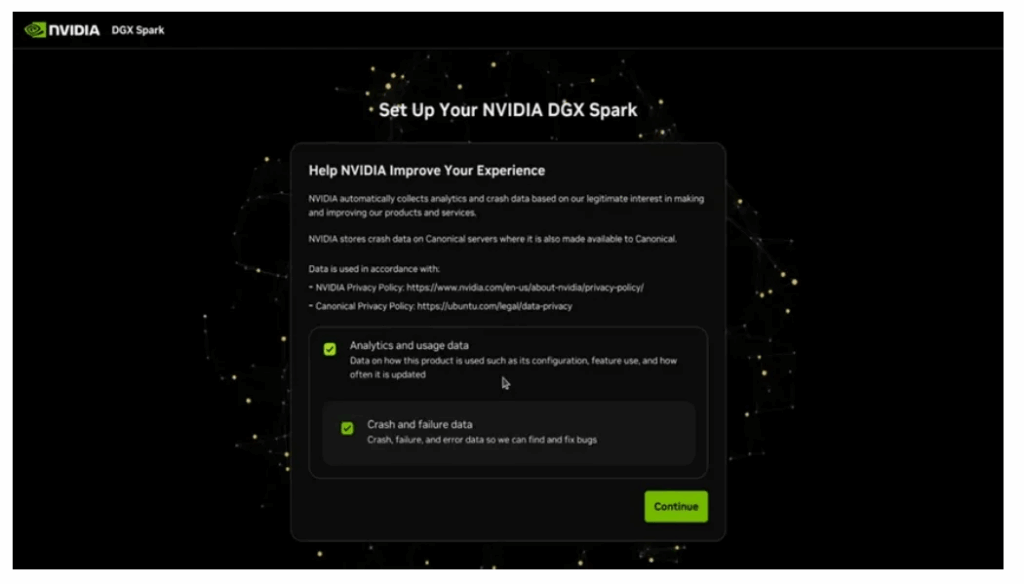
- User Experience Improvement Program (Optional) Choose whether to send usage data to NVIDIA (you can uncheck and continue).
- Wi-Fi Setup Select a Wi-Fi network. (If you’re already connected via Ethernet, this step is skipped.)
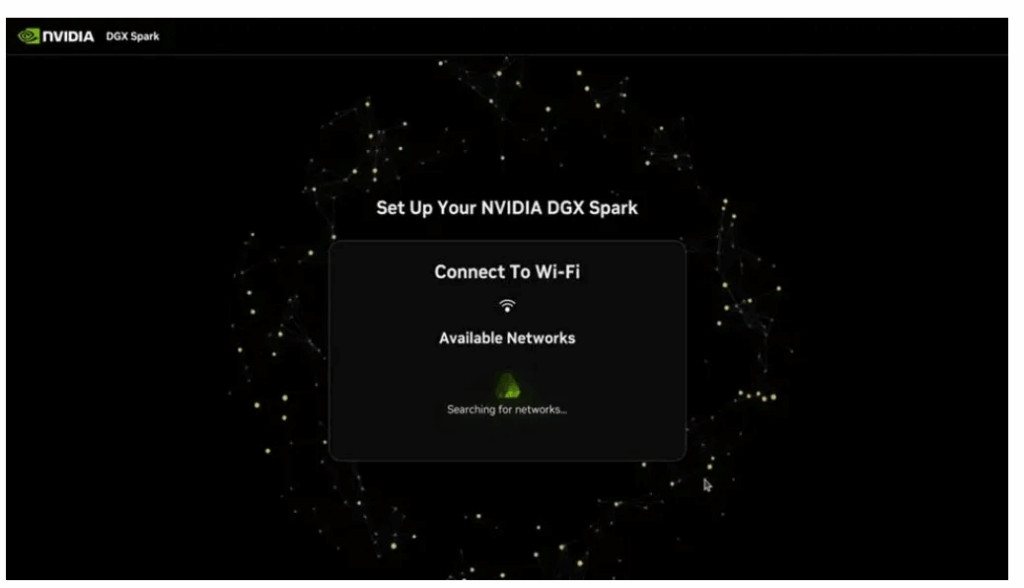
- Enter Wi-Fi Password
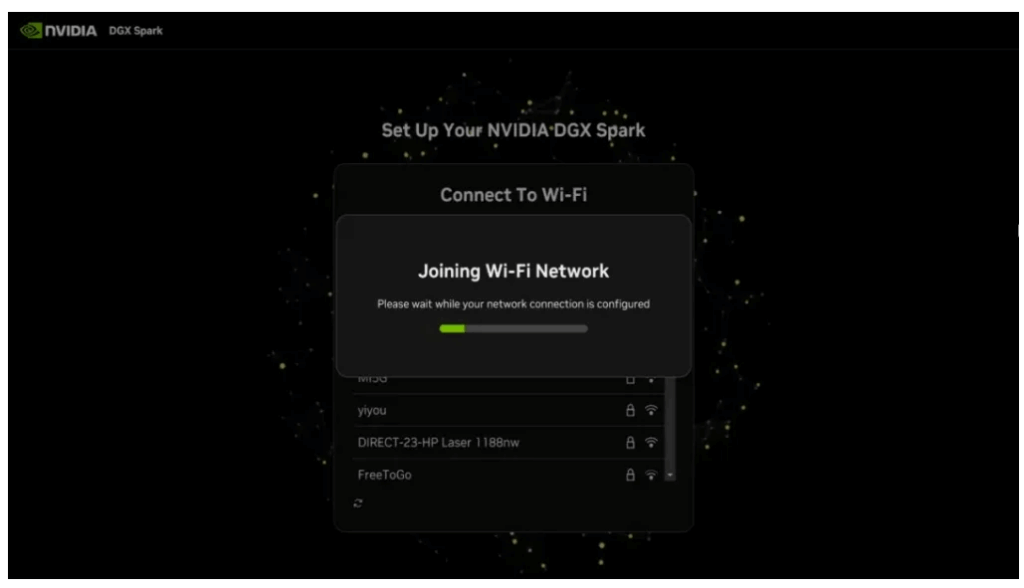
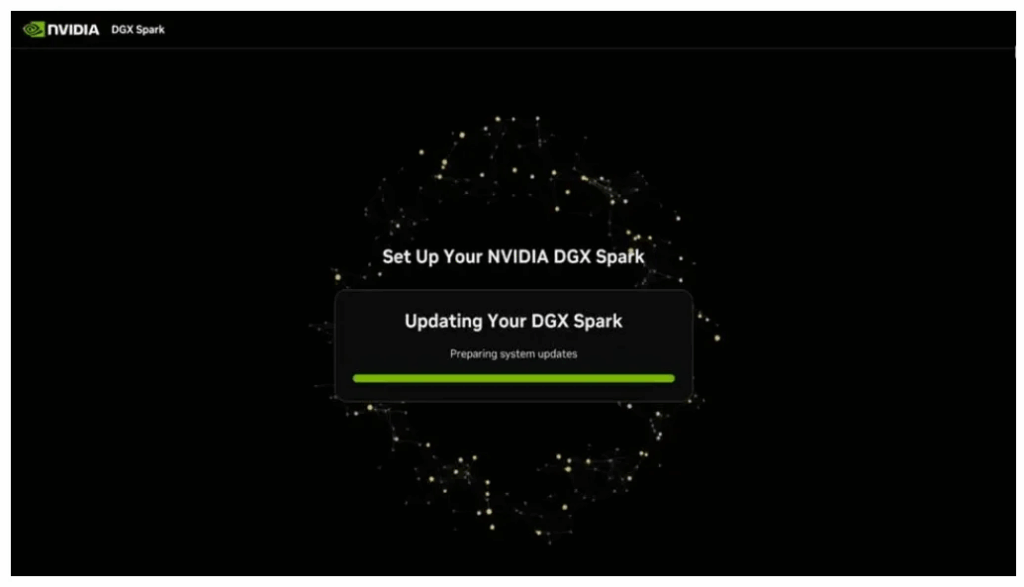
- Automatic Software Download & Installation Once online, the system automatically downloads and installs the complete official software image.
Warning: Do not power off or restart the device during this process. The system may reboot several times.
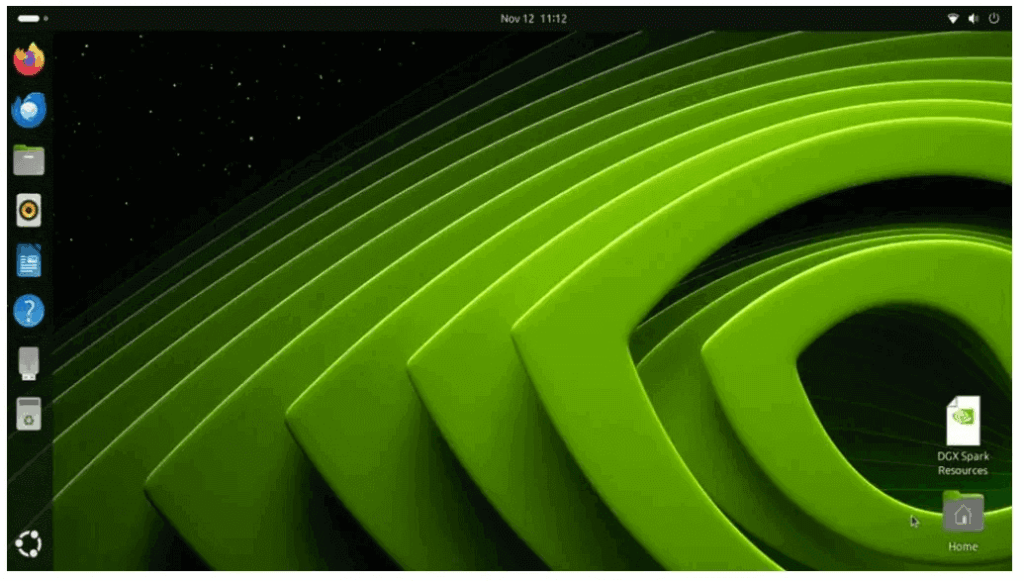
- Login After installation completes and the system reboots, select your user account and enter the password.
You’ll then see the clean DGX Spark desktop — ready to use!
4. Checking System Information
After logging in, press Ctrl + Alt + T to open a terminal (or find Terminal in the application menu).
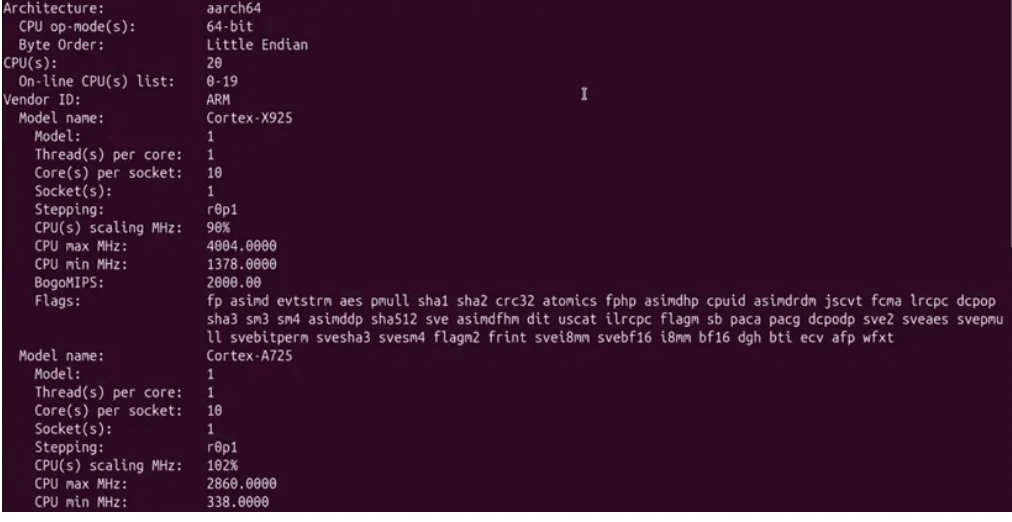
4.1 CPU Information
Run the lscpu command to view the CPU hardware information for the DGX Spark.
4.2 Disk Partitions & Capacity
Run the lsblk command to view disk partitioning and the size of each partition. The current DGX Spark system is equipped with a 4TB disk (displayed as 3.7TB because binary statistics are calculated based on 1024).

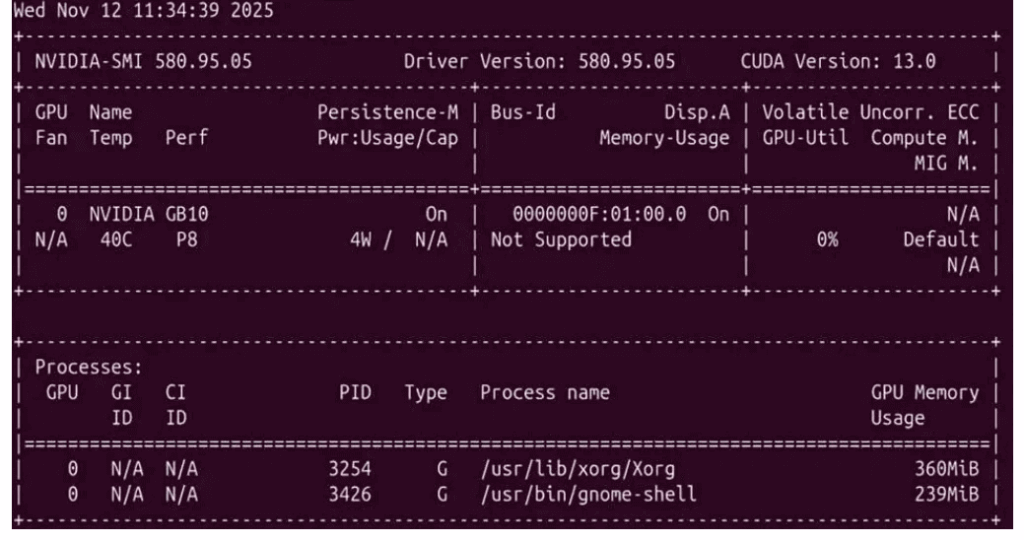
4.3 GPU Information & Status
Run nvidia-smi to view DGX Spark GB10 GPU information.
4.4 Docker Version
Run `docker -v` to view the pre-installed Docker engine information on the DGX Spark system.

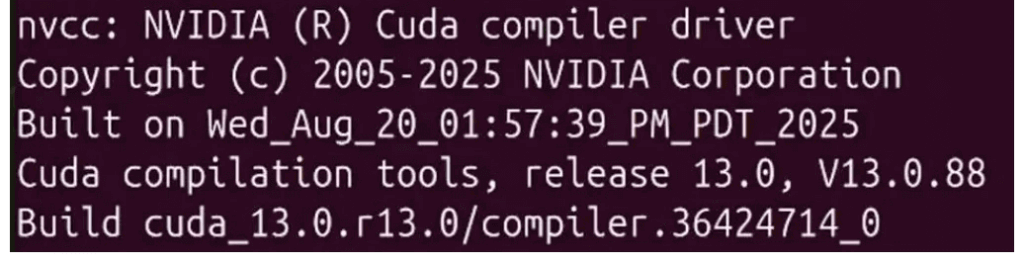
4.5 CUDA Version
Run `nvcc -V` to view the pre-installed CUDA version information on the DGX Spark system.
5. SSH Remote Access to DGX Spark
The DGX Spark runs a standard Ubuntu system with OpenSSH server pre-installed.
Steps:
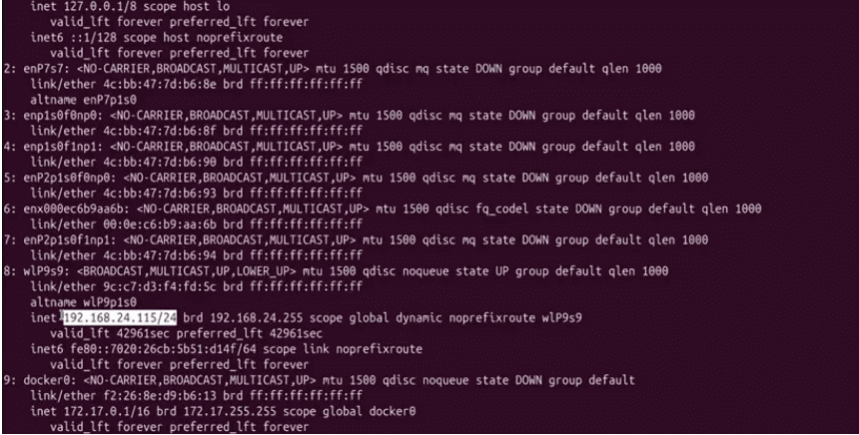
Find the IP address In the terminal, run:
ip a# orip addr
Connect remotely Use your favorite SSH client (PuTTY, MobaXterm, XShell, FinalShell, etc.). Example using PuTTY:
Create a new connection by entering the name, IP address, and port number (default 22). After clicking Open, proceed to enter your username and password.
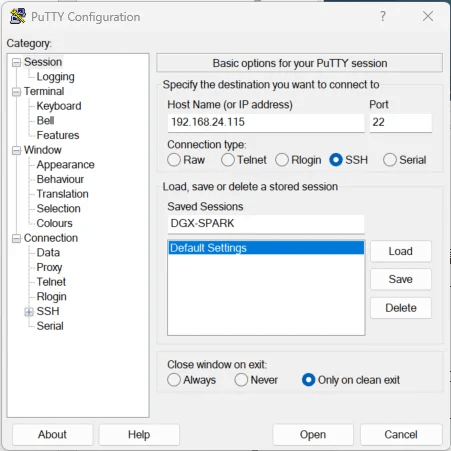
After clicking the “Accept and Save” security prompt, you can use the remote command line to operate DGX Spark.

6. Docker Configuration
6.1 NVIDIA Container Runtime
NVIDIA Container Runtime enables Docker containers to directly access GPUs, accelerating GPU workloads such as AI/ML and CUDA applications.
Key Benefits:
- Seamless GPU access for containers
- Automatic driver and library management
- Multi-GPU support
- Compatibility with leading container orchestration platforms
NVIDIA Container Runtime works in conjunction with NVIDIA Container Toolkit, which provides the necessary components to dynamically configure and attach GPU devices and CUDA libraries for containerized applications.
NVIDIA Container Toolkit is pre-installed and fully configured on DGX Spark systems, including:
- NVIDIA Container Runtime
- Docker integration
- GPU device configuration
- CUDA library configuration
6.2 User Group Configuration
By default, Docker requires sudo privileges to run. Adding a user to the docker group allows direct execution of Docker commands without sudo.
Execute:
sudo usermod -aG docker $USER
newgrp docker
6.3 Docker GPU Functionality Test
Download and run the PyTorch container:
docker run –rm -it –gpus=all \
-v “$PWD”:/workspace \
-w /workspace \
nvcr.io/nvidia/pytorch:25.08-py3
Running `nvidia-smi` and `nvcc -V` within the container both produce normal output, confirming that the GPU and CUDA are functioning correctly within Docker.
Your DGX Spark is now fully configured and ready to begin your AI development journey!
Related Products:
-
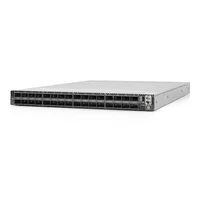
 NVIDIA MSN4700-WS2FC Spectrum-3 Based 400GbE 1U Open Ethernet Switch with Cumulus Linux, 32 QSFP-DD Ports, 2 AC Power Supplies, x86 CPU, Standard Depth, P2C Airflow, Rail Kit
$28900.00
NVIDIA MSN4700-WS2FC Spectrum-3 Based 400GbE 1U Open Ethernet Switch with Cumulus Linux, 32 QSFP-DD Ports, 2 AC Power Supplies, x86 CPU, Standard Depth, P2C Airflow, Rail Kit
$28900.00
-
NVIDIA MSN4600-CS2FC Spectrum-3 Based 100GbE 2U Open Ethernet Switch with Cumulus Linux, 64 QSFP28 Ports, 2 AC Power Supplies, x86 CPU, Standard Depth, P2C Airflow, Rail Kit
$23000.00
-
NVIDIA MSN4600-VS2FC Spectrum-3 Based 200GbE 2U Open Ethernet Switch with Cumulus Linux, 64 QSFP56 Ports, 2 AC Power Supplies, x86 CPU, Standard Depth, P2C Airflow, Rail Kit
$29000.00
-
NVIDIA SN5400 Spectrum-4 Based 400GbE 2U Open Ethernet Switch with Cumulus Linux Authentication, 64 QSFP56-DD Ports, 2xSFP28 Ports, 2 AC Power Supplies, x86 CPU, Secure Boot, Standard Depth, C2P Airflow, Tool-less Rail Kit
$39000.00
-
NVIDIA SN5600 (920-9N42F-00RI-7C0) Spectrum-4 based 800GbE 2U Open Ethernet switch with Cumulus Linux authentication, 64 OSFP ports and 1 SFP28 port, 2 power supplies (AC), x86 CPU, Secure Boot, standard depth, C2P airflow, tool-less rail kit
$50000.00
-
NVIDIA MQM8790-HS2F Quantum HDR InfiniBand Switch, 40 x HDR QSFP56 Ports, Two Power Supplies (AC), Unmanaged, x86 Dual Core, Standard Depth, P2C Airflow, Rail Kit
$14000.00
-
NVIDIA MQM8700-HS2F Quantum HDR InfiniBand Switch, 40 x HDR QSFP56 Ports, Two Power Supplies (AC), Managed, x86 Dual Core, Standard Depth, P2C Airflow, Rail Kit
$17000.00
-
NVIDIA MQM9790-NS2R Quantum-2 NDR InfiniBand Switch, 64-ports NDR 400Gb/s, 32 OSFP Ports, Unmanaged, P2C Airflow (reverse)
$24000.00
-
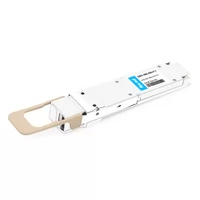
NVIDIA MMA4Z00-NS400 Compatible 400G OSFP SR4 Flat Top PAM4 850nm 30m on OM3/50m on OM4 MTP/MPO-12 Multimode FEC Optical Transceiver Module
$550.00
-
NVIDIA MMA4Z00-NS-FLT Compatible 800Gb/s Twin-port OSFP 2x400G SR8 PAM4 850nm 100m DOM Dual MPO-12 MMF Optical Transceiver Module
$650.00
-
NVIDIA MMA4Z00-NS Compatible 800Gb/s Twin-port OSFP 2x400G SR8 PAM4 850nm 100m DOM Dual MPO-12 MMF Optical Transceiver Module
$650.00
-
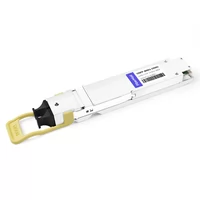
NVIDIA MMS4X00-NM Compatible 800Gb/s Twin-port OSFP 2x400G PAM4 1310nm 500m DOM Dual MTP/MPO-12 SMF Optical Transceiver Module
$900.00
-
NVIDIA MMS4X00-NM-FLT Compatible 800G Twin-port OSFP 2x400G Flat Top PAM4 1310nm 500m DOM Dual MTP/MPO-12 SMF Optical Transceiver Module
$1199.00
-
NVIDIA MMS4X00-NS400 Compatible 400G OSFP DR4 Flat Top PAM4 1310nm MTP/MPO-12 500m SMF FEC Optical Transceiver Module
$700.00
-
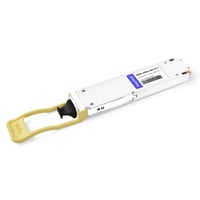
NVIDIA(Mellanox) MMA1T00-HS Compatible 200G Infiniband HDR QSFP56 SR4 850nm 100m MPO-12 APC OM3/OM4 FEC PAM4 Optical Transceiver Module
$139.00
-
NVIDIA MFP7E10-N010 Compatible 10m (33ft) 8 Fibers Low Insertion Loss Female to Female MPO Trunk Cable Polarity B APC to APC LSZH Multimode OM3 50/125
$47.00
-
NVIDIA MCP7Y00-N003-FLT Compatible 3m (10ft) 800G Twin-port OSFP to 2x400G Flat Top OSFP InfiniBand NDR Breakout DAC
$260.00
-
NVIDIA MCP7Y70-H002 Compatible 2m (7ft) 400G Twin-port 2x200G OSFP to 4x100G QSFP56 Passive Breakout Direct Attach Copper Cable
$155.00
-
NVIDIA MCA4J80-N003-FTF Compatible 3m (10ft) 800G Twin-port 2x400G OSFP to 2x400G OSFP InfiniBand NDR Active Copper Cable, Flat top on one end and Finned top on other
$600.00
-
NVIDIA MCP7Y10-N002 Compatible 2m (7ft) 800G InfiniBand NDR Twin-port OSFP to 2x400G QSFP112 Breakout DAC
$190.00